


.jpg)


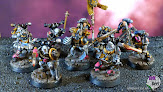
Moving onto Game 3, you can see my list here

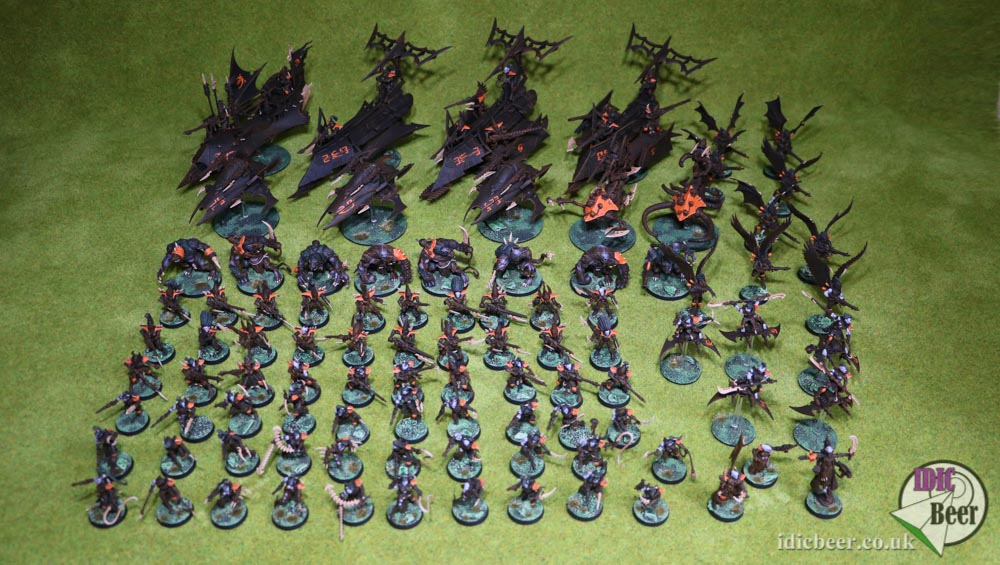
Game 3: David Calder, Tau, Purge the Alien, Hammer and Anvil deployment
PLAYER NAME: David Calder
Army Description: Tau
HQ 1: Shasel (50), Fusion Blaster (12), Plasma Rifle (20), Black Sun Filter (3) Iridium
Armour (20), Advanced Stabilisation System (10), Hard Wired Drone Controller, Hard
Wired Target Lock (5), Hard Wired Multitracker (5), 2 Shield Drones (30),(Warlord) = [155]
TROOPS 1: 12 Fire Warriors = [120] + TRANSPORT 1
TROOPS 2: 12 Fire Warriors = [120] + TRANSPORT 2
TROOPS 3: 10 Kroot = [70]
TROOPS 4: 10 Kroot = [70]
FAST ATTACK 1: Tetra (50), Sensor Spines (10), Targeting Array (5) = [65] FAST ATTACK 2: Tetra (50), Sensor Spines (10), Targeting Array (5) = [65]
HEAVY 1: XV88 Broadside (70), Team Leader (5), Twin Linked Plasma Rifle (10),
Multitracker (5), Hard Wired Drone Controller, HW Black Sun Filter (3), 2 Shield Drones,
(30) , Additional XV88, (70), Twin Linked Plasma Rifle (10), Multitracker (5), Additional
XV88, (70), Twin Linked Plasma Rifle (10), Multitracker (5) = [298]
HEAVY 2: Hammer Head Gun Ship (90), Plasma Cannon (15), Burst Cannons (10), Multi
Tracker (10), Black Sun Filter (5), Disruption Pod (5) = [135]
HEAVY 3: Hammer Head Gun Ship (90), Plasma Cannon (15), Burst Cannons (10), Multi
Tracker (10), Black Sun Filter (5), Disruption Pod (5) = [135]
TRANSPORT 1: Devilfish (80), Sensor Spines (10), Disruption Pod (5) = [95]
TRANSPORT 2: Devilfish (80), Sensor Spines (10), Disruption Pod (5) = [95]
ALLIED DETACHMENT: Orks
HQ1: Big Mek (35), Kustom Force Field (50) = [85]
TROOPS 1: 30 Ork Boyz = [180]
TROOPS2: 10 Ork Boyz = [60]
TOTAL: 325
FORTIFICATIONS Aegis Defence Line (50), Quad Gun (50) = [100]
So looking at David's list, it contains a lot of things to worry the Grey Hunters, with the combination of the Tetras and the plasma turrets on the Hammerheads (4 tl shot plasmagun range 48” i believe)(Tetra 4 TL BS4 marker lights that can plus BS or minus cover). The Orks make for an interesting screen. I feel I will be struggling to get any points out of this game, with only the Kroot looking vulnerable as the Fire Warriors can keep their range and I don’t really have the shooting to deal with the Devilfishes
Deployment: (night fight turn 1)
I was given first turn (again) and set about deploying my Aegis towards the right flank, David deployed his on the left flank, so I kinda knew where he would be going, David then got to choose if night fight turn 1 or not, and he chose yes. I then deployed with the Hyperios missiles and the blob on the left flank, everything else went on the right flank. David then deployed the Devilfishes, Broadsides and Warlord Battlesuit together behind the Aegis on the left flank and the Tetras and Hammerheads on the right flank. With Orks deployed in a ruin out front centrally the Kroot are then outflanking.
Turn 1
David had deployed out of 36” range of the Hyperios apart from the Quadgun, as I had no other long ranged fire power, I spent a turn moving the Vet squad away from the board edge on my right and the blob moved infield, slightly. David moved up the left flank with Devilfishs, the Hammerheads and Tetras on the right move down, they then opened up on the Grey Hunters, with a reduced cover save they are reduced to about 5, but they had to go to ground. The Broadsides and Quadgun fail to hurt the Hyperios Missiles.
Turn 2
I got all 3 Vendettas who can just about squeeze into a gap the Quadgun cannot get to bottom left, the blob shuffles infield again, the Veteran squad moves away from the board edge, the Vendettas and Veteran squad then remove both of the Tetras giving me first blood and 2 KP's. David's turn 2 and both sets of Kroot arrive on my right flank, both Devilfinishes turbo over towards the ruin in the centre of table to maintain their 2+ cover save! The Hammerheads continue to push forwards aggressively down my right flank. Shooting sees a squad the battered Grey Hunters reduced to 2 from the Hammerheads, then the Kroot finish them off.
Turn 3
With the Kroot in my lines I needed them gone because the platoon command was pretty close hiding behind a wall, which could easily be reached in a turn or 2 at the very most, so the blob moved over again and the Vendettas moved forwards just in front of a Hammerhead, the Hyperios bounce off the Devilfish, the Grey Hunters, blob and Veterans all open up into the Kroot and kill 1 squad off and maim another, for another KP. Dave's turn 3 and the Hammerheads on the right flank continue to push into my lines, this time both Fire Warrior squads jump out the Fishes and everything then opens up into the small Grey Hunter pack and Veteran squad, both are removed for 2 KP's.
Turn 4
The blob again moves towards the right flank as that's where the action is, the 10 Grey Hunters move forwards towards the Fire Warriors, the Vendettas then all move off the table, the blob then removes the 2nd kroot squad and the rest of my shooting whiffs as the Grey Hunters only kill a couple of Fire Warriors. The Hyperios missiles fail to scratch the Devilfishes again! David's turn 4 a Hammerhead comes crashing through the Aegis and into the Blob, which passes the tank shock, the Hammerheads and Fire Warriors all throw out sickening amounts of fire power into the blob command and Grey Hunters, the command goes to ground and lose 1 Guardsman, the Grey Hunters are removed through weight of shots.
Going into turn 5 I think it’s a good point to go through where we stand: I have taken out both Tetras and both Kroot squads and have first blood for 5pts. David has removed both Grey Hunter packs and the Veteran squad for 3pts.
Turn 5
The blob positions itself to get into combat with a squad of Fire Warriors and the Hammerhead, the Hyperios take out the Quadgun that's been shooting them all game along with the Broadsides (who have done no damage to the Hyperios Missiles). Now we have a little bit of a disagreement, I’m still not 100% sure how it really happened, but I declare a charge on the Fire Warriors and Hammerhead for a disordered charge, so I move closest to closest which is the fire warriors, then I move up keeping coherency, then I begin to move the meltabombs into the hammerhead at that point David stops me saying they still have to move towards the fire warriors, we have a min debate and then David concedes the point and I finish the combat, 1 Fire Warrior remains, who actually wins combat, as the 3 meltabombs explode the hammerhead killing about 10 Guardsman in an epic explosion.
David's turn 5 and the Fire Warriors in the open jump in a Devilfish which flies off as does the other, then the Broadsides open up on a Vendetta which has it's left wing passed a ruin, it’s then hit, penned and destroyed for another KP to David, in combat the lone Fire Warrior is hacked down and the blob moves up 6” towards the other Hammerhead.
We roll for the end of the game and we go to turn 6
Turn 6
The blob moves up and charges the Hammerhead with 3 meltabombs planted on it with 2 pens it explodes, and kills another couple of Guardsman. The vendettas in the meantime have dropped into hover mode and are cowering behind the ruins in the centre of the table from the Broadsides.
Davids turn 6 is basically a none event, the Orks which have moved up need an 11” charge to get into the blob, but they are moving through terrain, and the blob is so strung out there is noway it can all be killed and the Overwatch takes it out of charge range anyway.
At this point we have to call the game as we’re out of time, so we don’t roll for a turn 7.
Overall:
I was happy with the win, it ended 8-4 (18-2win) on points with me getting first blood as the only secondary objective achieved. It was a shame about the rules dispute which all seemed very strange, even now, I’m not sure why it even happened, if I’m wrong please point it out. Ignoring that moment in the game, the game went okay for me, doesn’t any game you win heavily? But the Vendettas are still whiffing, it took all 3 and the Veteran squad’s lascannon to take out 2 AV10 open topped 2hp vehicles, so they are starting to become more of a hindrance than help! Because they are so vulnerable to a first blood intercept and they have to be kept out of range, which usually means they are huddled in a corner so don’t do much turn 2 when they arrive, everything they have done they fluffed it /rant!
Moving into game 4 and I’m climbing the tables once again!


Great report and win mate, as for the disorderly charge, as long as you
ReplyDeletedeclare it so that your opponent can double Overwatch, then you move the
closest model into the primary unit, with all other models that can
reach a base in the primary unit, the ones that cannot reach a base can
then charge the secondary unit, all with the normal coherence rules of
course
I'm pretty sure that there is a restriction though, however that is that IF POSSIBLE, all models that can get base to base with the primary target must do so, but it seems like Rob did everything correctly anyway
ReplyDeleteCheers guys, yeah the meltabomb toting guys where on the other side of the tank, while I still had a good portion of the blob in combat with the fire warrior squad (about 15guys). Glad I played it right in the heat of the moment.
ReplyDelete